Printing Labels
|
•
|
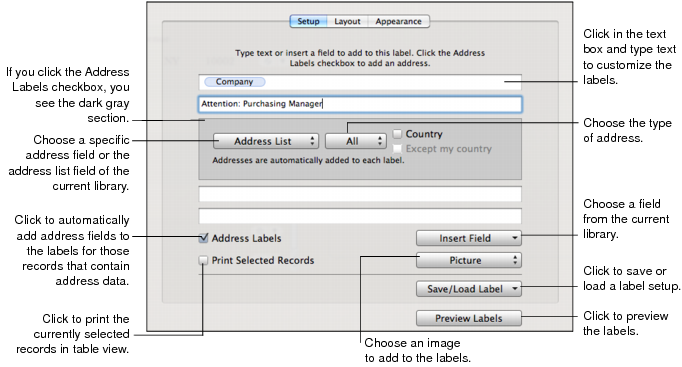
Print up to six lines of information per label. Text can be left-aligned, right-aligned, or centered on the label.
|
|
•
|
|
2
|
(Optional) Create a subset of records by using the search field, Advanced Find, or selecting records in table view.
|
|
3
|
Choose File > Print > Labels.
|
Click the Address Labels checkbox to automatically add address fields to the labels for those records that contain address data. In the dark gray section, you can choose to print all the addresses that appear in your records or just the addresses from a specific field. You can also choose to print a specific type of address from the selected field.
Select Country to include each record’s country on the labels. Select “Except my country” to omit your country from the labels.
|
5
|
Move the insertion point to the line where you want a field’s data to print, then click Insert Field and choose a field from the pop-up menu.
|
If the label layout has a line that contains a single field and there is no data in that field in some records, Bento closes up the space and doesn’t print a blank line on those labels.
|
6
|
To add an image, click the pop-up menu below Insert Field, then choose a media field or an image file.
|
If you choose a media field, what is printed depends on the contents of the media field for each record. If you choose an image file, the same image prints on all labels.
Left Align is the default alignment. Select Right Align to print the media field or image file on the right edge of each label.
|
7
|
For your convenience, the margin and gutter measurements for the label type and size are displayed. Use the Size pop-up menu to change the displayed unit of measurement.
|
9
|
Click “Start printing on” to specify which label number you want to start printing from. Click OK.
|
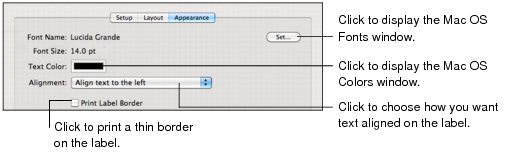
Click Set to change a font’s style, size, and other options. Click the color well next to Text Color to change the text color.
|
12
|
Note Data in a selected checkbox field prints on labels as  . Data in an unselected checkbox field prints as
  . Data in a rating field prints the number of stars representing the numeric value in the field (for example,
  ).
).
|
1
|
Choose File > Print > Labels.
|
|
1
|
Choose File > Print > Labels.
|
|
2
|
Click the Layout tab, click Page, then choose Define Custom from the pop-up menu.
|